Showing posts with label Tutorials. Show all posts

Friday, June 29, 2012

Camera Day project

As a known sucker for geeky holidays, as seen here I dedicated todays naptime to make myself a cute top.
.
Not long ago I bought this super soft white top for almost nothing, but it had disproportionally huge armholes.


Since naptime is not too long at this house, I had to be quick and efficient. I just marked the size of the holes using one top that fits me well and sewn through on the outer side of the top. Like this:

Cut of the excess.

By now you must be asking yourselves, what the heck does this all have to do with Camera day, she is resizing a top, big deal!
But it does, because when the top was ready, I printed out a super-cute camera applique (Funkytime provided it for her fb fans a few months back) on a transfer paper and ironed it on.

Note: 1. This is not an applique originally, so the image needs to be mirorred when printed on transfer paper.
          2. The image is b&w, this sophisticated ombre look was acchieved by the toner in my printer being low.

And this is me with my top on.


And for more free printable goodness including cameras jump here or here, to honor this special day:)


Linking to 30days

Saturday, May 12, 2012

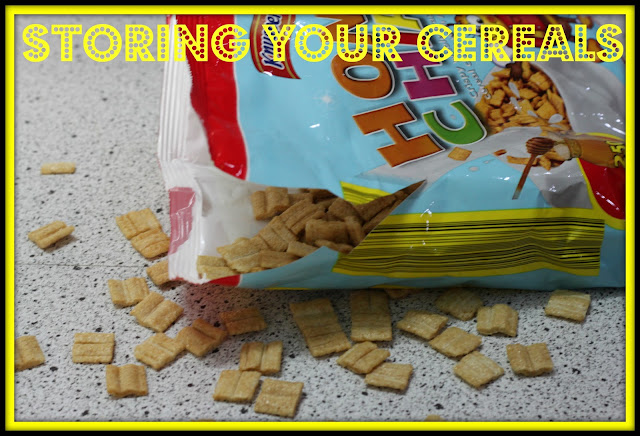
Cereal problem

It's been a hard week in this parts. What with kindergarten enrollement excitement and realizing my maternity leave will soon be over...

and then this happens on a Friday morning...


Every time I open a new bag, the stupid thing tears and I have cereals all around the place. To add to that, it is impossible to reuse that bag, you simply have to store your cereals in something else, something completely different.
Now, my kitchen is not one of those perfect kitchens, with perfectly organized neat cabinets containing numerous jars, one per type of food. My kitchen is one where when you are trying to reach a bag of cereals tragedy is bound to happen. A tragedy as serious as a


I have not yet recovered from this, but let's go on with my cereal problem.
As much as I love the look of glass jars and pretty food in them, as a mom of a 3 year old who sometimes insists on making his own breakfast, I see a glass jar potentially hazardous. I can also not afford this space wise, which is true for plastic containers all the same.  So what to do? - I was asking myself in the morning looking at that mess.
And then it hit me! And I was so happy to realise that my hours spent on the Internet perusing its vastness sometimes do come in handy.


Now pick it up and dangle it to test if it really works.


When you realize it does, dangle it extaticly into faces of your family members. Kids will most probably think it is funny, hubs will most probably not. But who cares, my cereals are not out of the bag anymore!


Linking to:
Hope Studios

Monday, February 20, 2012

The cheapest cool lamp, or the coolest cheap lamp EVER


You need:

IKEA EKBY VALTER bracket
IKEA HEMMA cord set
drill. screws, plug connector

And enjoy!


Piece of advice: if you are going to use it above your kids reading nook, use a LED bulb, those don't get hot, if your kid decides he wants to touch it, as mine does.

If you like my nook, you can vote for it by liking this photo here. I WON!


Linking to: Marvelously Messy, Sumo's Sweet Stuff
                 Whipperberry

Friday, October 14, 2011

KCWC Day 4 - Boys double-layer knit hat

A bunch of cut-up T-shirts:


two broken needles and a couple of hours later, this was produced

 There have been some unsuspected complication, and a point when I wanted to throw it all away. But I didn't. And I am glad.


P. is now a proud owner of a soft, comfy, double-layer knit hat, which is perfect for this autumn weather. AND it has a dinosaur on it. What more can you want?:)

Don't throw away your stained T-shirts, there is a hidden potential in them as you can see. Better give them to me.


Petra

P.S. I love comments, so please leave some. They don't have to be in English. If Hungarian of Croatian work better for you, please!


Katie's Nesting Spot

Tuesday, October 11, 2011

KCWC Fall 2011 Upcycled boy pants - tutorial

Technically, the first day of Kids clothes week challenge was yesterday, but since I finished my first projet at 2 AM, I can only write about it today. This is my first ever sewing challenge and I am really excited to show you what I've done. So let's start:

Besides the KCWC I decided to challenge myself a bit further, an not buy ANYTHING new, to see where I get with stuff I have at home, and here is what I came up with:

I have a skinny 2.5 year old, who still fits into his pants from a year ago, with one tiny problem...they are all too short, so I decided to start with that.

A too short track suit bottom, cargo pants mom doesn't fit into anymore, and a skirt mom never really fitted into in the first place.

Other things you will need:


-scissors
-sewing machine
-thread in your colour of choice
-measuring tape
-taylors chalk
-spirit level (if you want to to it exacly the way I did:)

I didn't really like the shape of pant legs, they were too baggy, so I decided to straiten them just a little bit. This is where the spirit level came in handy.

NOOOO, you don't really need a spirit level for this step..I just didn't have anything else on hand.


I was going to sew along the chalk line first, but then I realised it will be much easier to put in the pocket if I just cut the legs open.


This what my pants looked like at that point, and the print is where I wanted the pocket - to cover it.

Enter the cargo pant:

I cut out the whole pocket , then I resized it roughly to the size I needed to cover up the print on my track suit bottom, then I tried to trim it as nicely as I could to make a square. Because all the edges of the pocket would stay visible, I zigzagged it all around with a tiny zigzag, pinned it nicely where I wanted them, ans sewed around with strait stitch.


Now, I don't have a separate photo for this, but the small triange corner on the right side of the pocket had to be sewn on separately, so we could have a real pocket, not just a mimicked one.


Now onto the waistband. As you probably figured already, this is what the skirt was used for. I replaced the original one, to gain some length on the upper side too. I basically just cut off the waistband from the skirt and cut it down to the lenght of the original one. Here it is, already zigzagged all around:


Next, I took the removable part of my sewing machine off, to make it easier to sew around the tiny waist.


Now I pinned it very carefully, making sure I'm pinning all the layers.

This is what it looked like from the inside


 Now I just stitched as close as I could to the waistband, making sure I don't stitch through the outside part of the waistband, this way making it almost invisible.

When I finally sewed the crotch back together they looked like this leaving me with one last task...which actually started it all - LENGHTENING the pants to fit my son.


 I used one of his fitting pants to measure the needed length, cut off the bottom of my pants with their existing seam, measured the width of his pants, and made a ring.


I zigzagged it across the seam several times, because I wanted the zigzag to be visible from the outside.


When I stiched it to the pants, I tried to follow the original thread trace, to keep the original look.


And voila! We are done:


I hope the tutorial was understandable. If you have any questions, please feel free to ask, comment, or write me an e-mail. This is my first tutorial ever, and I must admit it was much harder to write it than to make those pants.

Hope you come back for more!

Petra


Update: Linked to the Get Your Craft on Tuesday link party!


HookingupwithHoH